Monday, October 29

Halloween: Horse Costume!

So midterms are done (yay finally)! I have been working on some sewing while I relaxed on my reading week. This past Sunday was supposed to be the Halloween horse show at my barn, but because of the horrible rainy weather lately they postponed it until after Hurricane Sandy passes. For my costume, I decided to be a Teenage Mutant Ninja Turtle, Donatello to be exact. And for my sisters costume, well lets just say she wanted to be a horse... Keeping in mind she would have to be able ride a horse in this costume - so she would be a horse on a horse! What a silly child, I love her dearly. So anyways, for this I will show you my steps in creating the horse costume. (Since she decided to be this for Halloween as well I had to put mine on the back burner and finish hers.) This will most likely be my entry to the Halloween contest as well :)

Maggie (my little sister) wanted to be a chestnut horse with a black mane and white markings. So off we went to our local thrift store to take a look around. I found a warm fluffy orange hoodie, with minimal writing/designs on it, that we would use for the body. I found the cheapest white t-shirt to use for the white sleeves or 'stockings'. I decided to use yarn for the mane and tale, the package we found had orange, black and white yarn all in one bag, so overall it was a good deal.


I made Mags where the hoodie and I marked off where the mane, tail and markings would be. Plus where I would put the ears. I only had to cut the sweatshirt three times: once down the hood and past the neck for the mane and I cut off fabric from each sleeve to use for the ears.


 For the mane I was following multiple tutorials. I took my yarn and I just wrapped it around a piece of cardboard until I was happy with the thickness. Word of wisdom which the first tutorial forgot to mention; don't wrap the yarn that tight around the cardboard because when you cut it free it will get shorter and 'spring' back up. I guess its common sense, but they shouldn't assume everyone has it! :P


After cutting all the thread free I realized I would most likely need my sewing machine to secure all the yarn together. Of course my sewing machine was at my parents so I figured a way around it. I cut a line out of the white t-shirt that was the length of the 'mane' and I carefully placed all the yarn on top of it (as shown below). I then sewed the mane together in sections - however this wasn't the best approach and I really should of got my sewing machine. But I was making do with what I had, so I just went over it many times sewing different chunks together until it somewhat was secure.


Close up of underside of mane.
First run through of securing the yarn complete.
After I finished the mane, I placed it in the cut section of the hood (it goes straight down the middle to about the back of the neck). Pictured below is the hood getting pinned up (with the mane on the inside) so I can sew it shut! The white t-shirt that I sewed the yarn into became handy during this step because I was able to use it to sew the mane in place. I had extra 'mane' so I cut it off and it because the tail. I just sewed the tail onto the orange fabric where I wanted it to go; nothing special there.


The wee little tail :) All pinned in place and ready to sew.


Now that the horsie costume had a mane and tail, all it was missing was the ears (and 'stockings'). For the ears, I cut a section off each sleeve, then cut even squares from each. I folded one corner up to the middle of the square and bent it into an ear shape and sewed it together. Once I had both ears I pinned them in place and finally sewed them. For the 'stockings' I cut the white t-shirt and wrapped them around the arms. I sewed each in place.

After that it was just a matter of finishing touches; since she wanted to wear it for Halloween, I had to rip the logo that was stitched into the hoodie. This took about a full day or so to get done, but it was worth it.

Evil cat intermission....


And might I say she was one happy camper. For the horse show she will just wear her riding breeches most likely but for Halloween I think Mum and her were going to try and get pants of the same colour and some white leg warmers. Yup Halloween may commence.

Happy Halloween, stay safe and warm! :)

Friday, October 26

How Not To Marble Paper

In school we have a course called 'Experimental Glass' wherein everyone chooses a topic, technique, etc. that they're interested in and they go to town with experiments. Off the bat I wanted to experiment with texture and food because I'd been getting into that over the summer, but I soon discovered that I didn't think the structure of the course went well with the way I wanted to structure experiments with texture.

So instead I decided to link my topic from my Independent Research Project up with the topic for Experimental Glass, and thus, I decided to begin experimenting with marbling paper. Marbling glass techniques already exist, but I want to marble glass in the way that paper is marbled, not by pouring some paint onto a glass plate and just swirling it around. I mean have you ever seen the insane pictures people can create by painting on water? It's amazing!
Supplies
So, tonight I tried marbling paper for the first time thinking it would be real easy. I got about two marbles out of my attempts and that's it. it's funny how something so simple, with such simple instructions, can go so wrong.

You can marble with acrylic on water, or you're supposed to be able to, and that went best, but didn't work. Gouache didn't help. Apparently water with a 'drop' of soap on top should do the trick, while I used a couple drops and a whole ton of drops and it did not create a nice layer on the surface for the paint to sit on. I think maybe it's all in the technique, I suck at laying the paint down and I find using an eyedropper completely impossible - it just makes bubbles.

So the conclusion? I guess I'll just have to keep trying, no matter how much it pains me to have the same results over, and over, and over again. Eventually I'll get it right, and that's what matters.
First Attempt!
The structure of the course is akin to this method really: try Paint A with Water Solutions 1 thru 10, then repeat with Paint B, etc. Then I'd have to try my preferred methods with different glass surfaces, and once I really knew what I was doing I would, theoretically, have a way to float enamels on a water/liquid solution and roll my glass over that. The end product being successful seems a little unimaginable right now, but I'll get there.


Second successful attempt!

As a double conclusion, I also think it's really important to be willing to switch up how you work on things. Clearly my approach to texture didn't mesh well with this approach to experimenting, so I would have just suffered if I had kept with it.

Monday, October 22

Silly Ideas

I often come up with silly ideas for things I want to make out of glass, but I never end up making them since they aren't serious, thoughtful projects. It occurs to me though that maybe silly ideas should just be made, even if they will never be gallery pieces, nor art that will ever be purchased. I mean, I've said something about this before, that going through a lot of ideas and working through the bad ones is important, so I don't see why working through the silly ones shouldn't be just as important, if not a lot more fun and rewarding too!

The silliest idea I had over the summer that I can recall is the plan to make a large skeleton of a city - like a wire structure, but out of small flameworked rods of glass. I imagined that it would be so fun to dress up in jeans, boots and safety glasses and go stomping around a glass city and tearing it apart as if you were Godzilla, wouldn't that just be a great feeling? And I'm not sure how other people feel about breaking glass or the sound it makes, but oddly, glass artists seem to really enjoy it - unless of course it's a piece they care about and after spending two hours on it it just cracks off the punty and smashes to the ground.


I had a few other silly ideas this weekend when I was away at a conference in Corning, New York. The first came up when I wanted to play some board games in the hotel, because I'm not a drinker or a partier. I wanted to make a boardgame for glass artists, and everyone quickly jumped in and told me that the board and most of the components would have to be made out of glass. It's on the verge of being a project I'll actually have to go through, despite the fact that I have absolutely no idea what type of game it would be. Monopoly for glass artists is my favorite, but there could also be a Snakes and Ladders game, though the name isn't quite worked out yet (Pipes and Puntys?). Then there was the concept of trivia games, and well, any sort of board game we could think of.


The second idea came on the way home when we stopped for a lunch break on the side of the highway and just about everyone got obsessed with the claw games that were there, because we had to spend our american change on something, right? I absolutely love the concept of claw machine games, because for a dollar you have the chance to win a larged stuffed animal, but the point of playing isn't to get a cheap toy, because the fun part is getting riled up with your friends while you either work together or battle against each other in an attempt to get that stuffed animal. I thought that I would love to bring that concept to glass, and I came to enjoy the backwards concept of a claw machine to win glass prizes.

Can you guess what the issue with that is? If you like a piece of art you can attempt to win it, and for a dirt cheap price no less, but the catch is that in attempting to obtain it you will definitely scratch the piece, if not break it. The claws could scratch the glass, not to mention the glass dropping and banging against another a piece, and even if you successfully get it in one shot, you're dropping it down a hole, so something bad is bound to happen! I really, really like this idea, though if I actually wanted it to be workable I'd probably have to be kind enough to bubblewrap everything and glue photos to the front of the bubblewrap - but that's not as fun, is it?

The conclusion? Silly ideas are great and they may or may not turn out to have some conceptual value, but that shouldn't matter. Silly ideas make people happy, and I think that's pretty important, because I think the mark of a successful piece is to create one that evokes an emotion.

Wednesday, October 17

Busy busy busy

As Nikki mentioned in the last post (and as you may have noticed) we have been super busy! There will be no battle this week since I was not able to make my sculpture yet and Nikki was the only one to submit one. I do have plans to start and finish it, but not until after my midterms (luckily my last one is tomorrow and let me tell you - I will be sleeping for a whole day after!)

There is not much else going on for me art-wise. I hope to do more of it in the future obviously but we will get there. I will have to use Nikki's method to organize my goals! :P

Take care everyone and I hope you are enjoying your Autumn! For me it is going by too fast D:

Monday, October 15

Working With Charities

          A lot of good opportunities come my way through Sheridan’s glass program, the latest being a charity that has commissioned our studio for a minimum of 500 snowflakes. A lot of things happened to even get to the ‘start’ of this commission, and during the process of creating these snowflakes a lot more lessons will be learned as things get hashed out.
 
          Details about the order, cost, timing, etc, were hashed out between the teachers and the charity, so the starting point for the students was . . .

1. Designs


We knew that every creation had to be ‘snowflake’ themed, visually light, light in weight, not clear, and that they made an exception that icicle ornaments were alright. We had one week (extended to two) to come up with our own concepts to pitch, some other people’s designs included blown ornaments, press stamps, flameworked snowflakes, sandblasting designs, even paper snowflakes inside of a blown ornament!

I went the route of fused glass snowflakes, despite having no idea how to do that. It was a bit of a mess but by the second time around I figured out a decently efficient way to nip the sheet glass, as well as my firing program and I even saw improvements to my kiln wash. The result? Luckily they were a huge hit! The ladies representing the charity picked their favourite designs and made some people’s lives easier by deciding they liked how clear glass looks. After the fact the teacher’s were kind enough to give us some pointers for the future.

2. Negotiations


            I don’t think a lot of people knew what to ask about when the students had a meeting with the clients. We let them browse through our pieces, explained how things were done, answered any questions and tried to think of our own to ask. We were far too eager when it came to answering and asking questions though, our teacher’s pointed out that that was a bad thing. When the client was satisfied with a clear design, we shouldn’t offer color out of the blue (it’s another step for us, it’s more expensive, and it’s clearly unnecessary). If we have two designs and one is a lot easier to make than the other, there’s no harm in letting the customer be satisfied with the easier design, even if, in our minds, we may worry that we’re limiting the customer and turning them off, but if you ever feel like that just remember, if something’s not broken, don’t try to fix it until it is!

3. Plan of Action!


            So we grouped ourselves off; blown ornaments, icicles, cut and fused glass, and - fused snowflakes! Yay, sweet success! A few issues quickly arose though, the first being that it can be hard to corral a bunch of people, even just four or three, into meeting together at the same time. This delays things a lot, which is bad, so follow my advice and forcibly make plans as fast as you possibly can!
            I also wrote out designs and sizes of snowflake components, because, well, that is a wee bit important. After our first load we discovered that an estimate of fitting 25 snowflakes into the large Italian kiln at once was, lucky us, a little too low! We snuck in 35 snowflakes at one time, so with better placement we can probably fit in a few more! At $3.00 a piece – yes that’s the student’s profits for this commission – Chris and I pulled about $24.00 an hour setting up the first kiln.

4. Quality


            I think the first set of snowflakes turned out great, and only one snowflake didn’t fuse properly! Still, I think the quality of these snowflakes isn’t too great in comparison to the first ones that were made. I care a lot about quality and so I paid a lot of attention to the cutting of the flakes, making sure that all strips are ¼ inch thick. The only issue my flakes have are with little points that for some reason don’t get smoothed over during the firing. The pieces used in this firing ranged from just under a quarter inch up to a half inch, and some chunks were even larger than that. The time that went into making sure the small pieces went with the small pieces, etc, was a bit of a waste, but live and learn, right?

            And that there is about all I’ve thought to share with you folks of the internet. Like always, I’ll try to edit in some more photos later, but despite how proud I am of these pieces I’ve made, it’s funny how I’ve never gotten around to taking pictures of them.

5. Why?


            Ah one last thing, this whole post was important to make because in the future I would like to be very closely tied with charities whenever possible. I have no problem selling pieces off at a low profit so that they can be auctioned off at charities, in fact I think it's a great way to help people. After all, no one trusts donating money to charities anymore, right? You never know where it will go, or how much of the not-for-profit profit goes into salaries. At least in a trade off of a commission I can feel good that I attempted to help out for a fair trade and that someone who wants to help out through a donation of money can recieve and enjoy my art in return. That way, even if the charity is crooked and only 2% of the money earned goes to the charity it's intended for, both myself and one other person will actually get something out of it. 

           Actually, this really goes a lot farther than that. I have big, big, idealistic plans for ways to directly help people out when I'm an established artist, because just because I don't know which charities to trust doesn't mean I shouldn't do anything. I have a feeling that my ideas would crack my parent's heads right in two, as they're aleady so concerned with the near future and the debt from going to school. I'd let a few strangers on the internet in on my great secrets, but I can't have one of you putting the plan into action before me, now can I?

Saturday, October 13

Battle 06: Start!

Here's the theme for Battle 06, if you can't guess what sort of generic fun it will be, then we are disappointed in you!

Theme: Halloween!

Yup, the computer is still broken

There is a particular reason why the theme is Halloween, and it's not because we love the holiday and think holidays deserve special awesome attention! No, it's because this theme is large enough that I dearly hope I can persuade some friends to enter the battle!

If you are making;

- Your own costume
- A creatively carved pumpkin
- A candy sculpture (someone please do this!)
- Some production pieces to sell
- A piece of art with Halloween themed colors

You can go on ahead and enter! Most artists seem to enjoy Halloween, so I'm operating under the assumption that we'll all be making Halloween themed art anyway!

I am doing, I'm not sure yet, hopefully a bowl!

Friday, October 12

End of Fall Battle!

1. Nikki
Pumpkin!
This is actually, sadly, only the second blown glass pumpkin I've ever made, I was a very, very poor student last year (sorry guys, I'll make up for it!). I recieved what turned out to be a clear and unexpectedly cold pumpkin stem bit, which is why it's so tiny, and frankly adorable - in my opinion anyway. I absolutely adore this, and the clear stem just makes me think of Cinderella for some reason!

Well the end of this battle is late, and I think also very telling for how difficult the future will be. It could just be that the time we alott ourselves is too short, but the fact of the matter is, I think both Jessie and I find it very difficult to balance art with something else, even if it's just one piddily sculpture. I suppose the midterms and due dates that we're struggling with now will one day be something like our every day (or at least our average) work life, and that's a little bit scary.

I myself am an art student, so surely I should be able to balance art with art! The due dates that matter are for academic classes though, while the due dates for glass related work tend to fall to 'end of the semester critiques'. Yes everyone in the studio is always working and creating, but it almost seems harder without a strict regime to follow.

In our Independent Research Paper course the teacher is trying to avoid this 'leave it to the last minute / get caught off guard / be less productive than you should be' kind of unfortunate circumstance by setting a schedule for us. This week was the rough one paragraph draft for our proposal, next week it will be refined, two weeks from then we will have a 750 word rough draft, and ultimately we'll have a 3000 word paper.

When this blog started out I was extremely excited and got far far ahead of myself, I really wanted to make it stranger friendly from the get go, to invite everyone in to come and enjoy the journey of art with me, but I like the direction that I think it's taking now. I don't think Jessie and I should worry so much about trying to guess what posts would appease our audience as we should just be posting about our journeys, and especially about those moments when we recognize a trial that must be dealt with (be it a one time issue or a life long one). At least, I enjoy writing like this. I think the post about Goals has recieved more likes than any other (and that's one of the few ways we have to judge the popularity of posts), so that has to mean this is the right direction. Besides, the most exciting thing to me is to be able to share the information that I learn in school with people who aren't lucky enough to be there (can you tell that I really, really like school? Ahem).
Monday, October 8

What Is Kiln Casting?

Also known as, "I don't get it, what the hell is kiln casting?"

This is by no means an in depth tutorial, but it hopefully allows people to better understand the process at a glance.

Step 1: Create a mold out of clay or wax.
Some tiny bowl molds. The bottom halves are 'reservoirs' that will hold the glass. Since they are attached to the table they will also be the only area the plaster doesn't touch (and therefore the opening).

Step 2: Pour a mixture of plaster and silica over your clay/wax positive.
(This just looks like a big white cylinder, hence the lack of images to draw from.)

Step 3: Remove the clay/wax from the now solid plaster mold, replace with glass shards.

The mold has been flipped over. Chunks of crystal are sitting inside the reservoirs.

Step 4: Melt it.
After a full melt. I think the mold process is a lot easier to understand after seeing the broken away plaster and the upside down bowl. 

Step 5: Remove the plaster. Choose to freak out in horror or joy at the result. Preceed to spend one to ten hours coldworking / polishing it.
The final product, six tiny bowls that are stacked on top of each other!

And there you have it, some images to cover the basics of kiln casting! If anyone is having trouble grasping the concept still, please let me know! This seems very straight forward to me because I do it, but if it confuses other people than it's a very bad tutorial!

Friday, October 5

Jessie's Sculpting Walkthrough

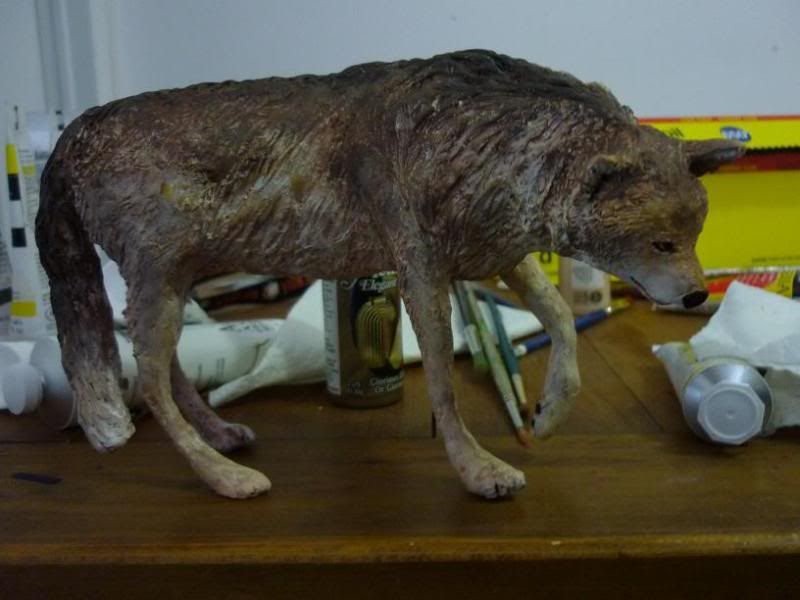
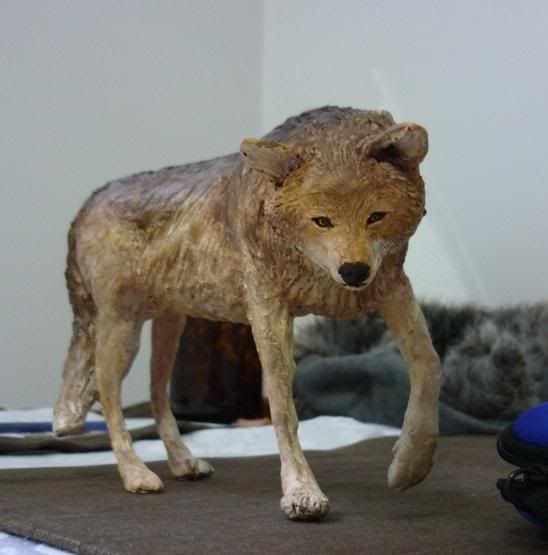
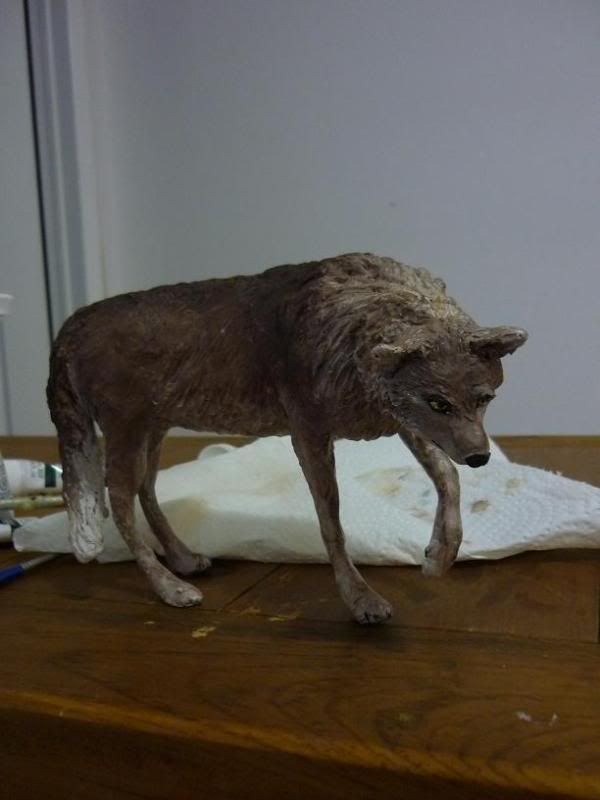
These are the basic processes/steps I go through everytime I make one of my sculptures. I don't have pictures of everything so I am improvising with explanation or borrowing other pictures. (I can assure you I did not go from a dinosaur to a wolf!)

The Idea

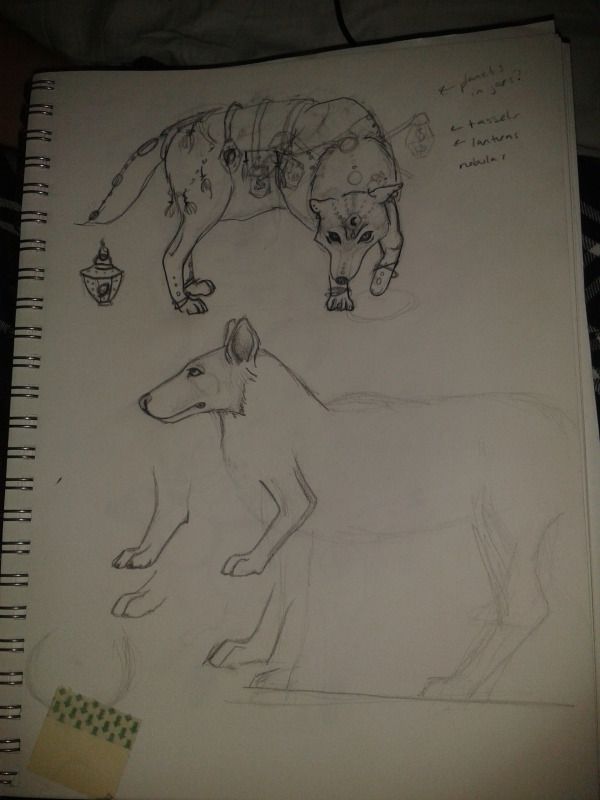
The first thing I can do before sculpting is coming up with an idea (this goes without saying). But okay what do you do after you have the idea? Well I sketch it out. For anything other than a human I sketch out a side profile (for the main shape) and a front profile (for the legs/arms); if it is a human, front profile is sufficient. I will generally draw the sculpture to scale and use it to measure and cut the wire for the armature.

Top wolf was my initial pose and plan.
Second wolf was my sketch for for the armature.
The little drawings of paws was me trying to figure how
to draw/sculpt the paws.

The Armature

Armatures are the skeleton of your sculpture. You want your armature to be sturdy and balanced (especially if it will be a free-standing sculpture). Just because you armature is balanced and will stand now doesn't mean it will still be balanced once you start putting on the clay.

Some things to consider are:

  • Where is the maximum bulk of your clay going to be? (for my Wolf, it was going to be the mane/neck)
  • Will this extra weight make my sculpture unbalanced? (Yes)
  • Where will you offset the weight? (I bulk out the mane with tinfoil so I will use less clay and I will add more clay to the tail to help even the weight)
If I had chose just a normal standing pose (with no bending to the inside) I wouldn't have had that big of a problem with the mane being heavier. But since I chose this pose, once I started putting the clay on, the outside caused him to topple over. I had to keep re-bending the armature and adding clay to other points until he was balanced.

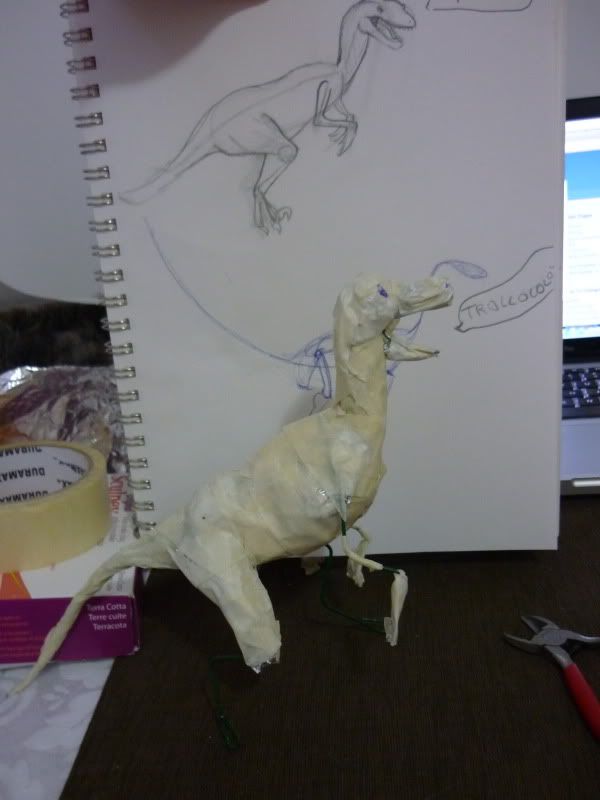
I didn't have any pictures (at least on this computer) of the wolf's wireframe before I finished bulking him out with tinfoil ... so here is Velcro the Velociraptor in partial wireform. 


You can see the floral wire still and bits of tin foil. After you bend your armature into the shape you are happy with, secure any joins with masking tape or even plumbers tape might work. Next you will want to use tinfoil to bulk out the areas that will take the most clay. I generally scrunch up the tinfoil and try to follow the muscle groups with it. I generally leave the legs and paws just wire and masking tape.

When you are happy with your amount of bulkiness, then wrap the fellow in masking tape to keep the tinfoil from moving and to provide you with a smooth solid surface to start adding clay.


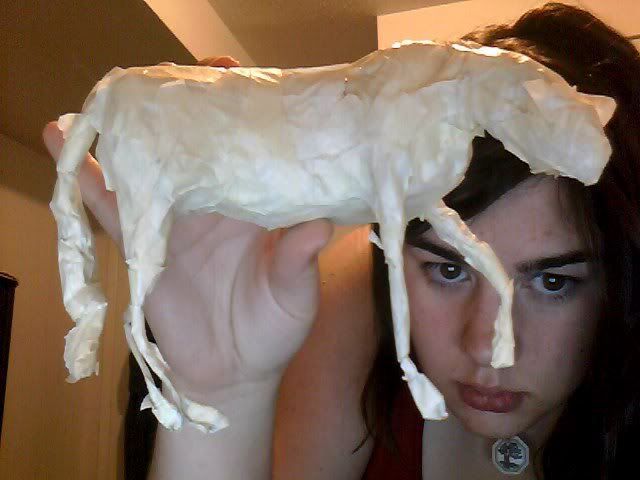
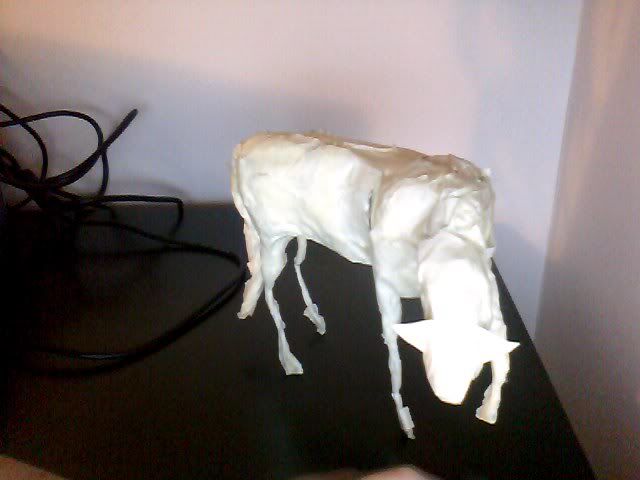
These are two sculpture ready armatures!
Warning: Do not overbulk your sculptures with tinfoil. I have a tendency to do this sometimes and end up having to try and cut off some of the tinfoil (which is annoying and hard to do) or smooshing it. Basically you want your bulked armature to look like a emaciated version of whatever you are making. You have to account for the clay you are adding on and the thickness it will provide. As you can see I over-bulked my wolf! And I had a heck of a time to make him not look just plain chubby.

The Clay

When I start out, I try to apply an even amount of clay to the whole body. This allows me to see where I can afford to put more clay without creating a puffball. Next I start adding rolls of clay where the different muscle groups are - I was taught this in school and I find it makes the difference. 

I used Sculpey Original (his body) and Super Sculpey (his head)


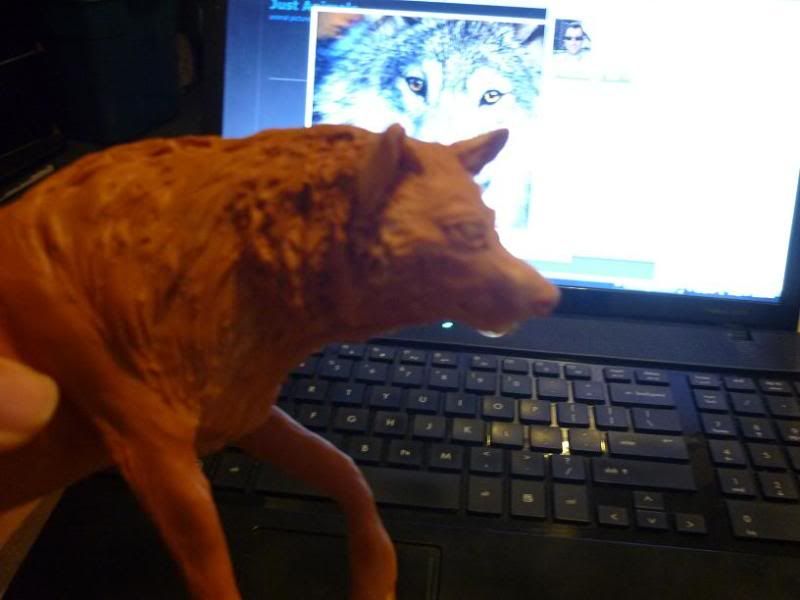
Once you are happy with the overall shape of your creature, its time to start refining the features. This is the stage where I sculpted the paws, mouth, nose, eyes and ears. I added clay for fur and textured what was already there of his mane and tail.


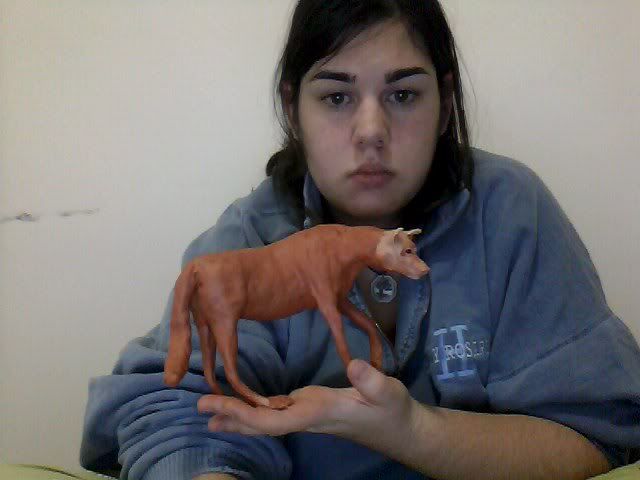
Alright I usually leave the sculpture for a few days and won't even look at it - then I come back with a fresh set of eyes and fix anything I am not happy with. This wolf's eyes were giving me trouble, but I thought I was happy with them and decided to bake him anyways.

The Bake


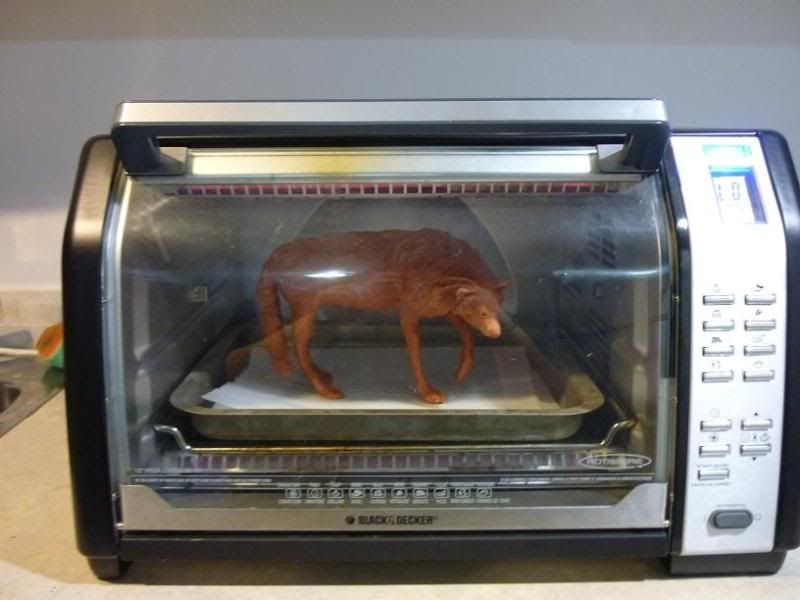
Not much to say here other than follow the manufacturers instructions on how to cook your sculpture. And keep a watchful eye on it if it is close to the element like this guy is. I burnt his back a bit, but it looks okay when I was painting him. I have never really experienced an issue by burning a sculpture, except for when trying to paint a lighter colour. 

The Paint

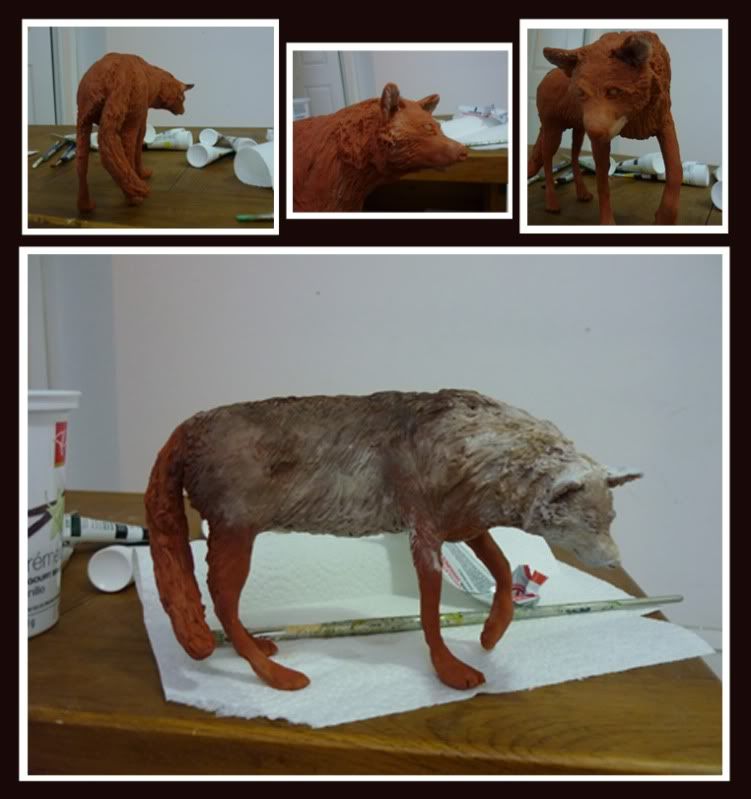
He is now baked and ready to be painted. I tend to dry-brush paint my sculptures, I generally like the look it gives them. Everyone is different when it comes to painting. I generally have 3 techniques: airbrushing, dry brushing, and pastel painting. 


I was finished and I hated him. The nice colouring I had got too dark and it turns out I was not happy with his eyes and nose afterall. I wanted him to have a gentle look, not have the face of a cartoon villain. So as much as I hated to do it.  I find at this point you have 2 options... write it off and deem it done or fix it. I chose to fix it, so I started to re-add clay to his face in hopes of fixing the eyes and nose. This would have been a lot easier before he was baked lol. 

The Finished Product

I was grumpy about having to fix my wolf, but I was a lot happier with the outcome and I am glad I did it. I actually repainted his whole body. I painted him bright yellow, red and orange before starting with the neutrals. The clay made a nice warm colour that showed through the paint and I wanted to mimic it again.


Wednesday, October 3

Battle 04 Winner!

Total Votes: 5
Nikki (Penguin)
  2 (40%)
Jessie (Polar Bear)
  3 (60%)


It looks like this week's winner is none other than Jessie and her stupidly adorable bear! I really can't wait to see what he looks like after some more painting, and I really wish I had concepts as neat as this bear -shakes fist-.
He's too darn cute, damnit!

On a happy side note, Jessie and I both noticed that the last post - Organizing Your Goals (3 Starting Steps) - has received 10 Facebook likes all on it's own! We're just overjoyed, seriously!

Monday, October 1

Organizing Your Goals (3 Starting Steps)

As this is my third and final year in school, a lot of the year seems to be focused on identifying goals and then figuring out a good path to them. This is very easy for some people, but very difficult for others, and of course, there's no one reason why it's like that. Some folks already have a set idea of a series of pieces or exploration in their mind so they know what their goal is, while others (like me) have a lot of ideas and don't know where to start, and I'm sure a few others don't have any solid ideas at all.

I've decided that earnestly contemplating your goals is very important, so I'm going to go ahead and share some ideas/pointers with anyone who's willing to listen!

Step One: Spend A Solid Hour Thinking And Writing About Your Goals

If you have isolated stretches of time in your day, like sitting on a bus for an hour, I suggest taking advantage of that time. Otherwise, I hope you're disciplined enough to stay away from your phone, computer and ipad.

What I Found

While making my dot jot list of ideas I found myself thoroughly thinking through all my possible goals, because why not? I had the time. I let them range from simple goals, up to absurd things that may never happen, and over to ideas that I would never have paid enough attention if I didn't write them down - the example for this one being that at different times of my art life I've always come back to the idea of (one day) putting over 100 hours of solid work into just one piece of art.

Step Two: Realize Your Goals Tend To Have 'Distinct' Time Lines And Adjust Accordingly

 Organize your goals into time frame categories that seem appropriate; short-term, long-term and, dream-term; one semester, two semesters, five semesters; this semester (four months), this year, five years, decades down the road if I can; student, emerging artist, experienced/established artist; etc. Please note that by no means am I suggesting you say, "I need to have all this done five years today, or else." That might be a little unrealistic.

Your goals may also have related themes, needs, etc, so don't forget to factor that in if you have to, or at least acknowledge the fact. In my list I found a big group of technical and skill related goals, a set of goals that related to owning or growing my own business, and a set that I perceived as being possible preferably (or most likely) after being some form of established professional.

A categorized list!

What I Found

Organizing some things, like making an oval glass frame and doing a 100+ hour piece of work actually weren't that hard. I'm not sure how to classify some 'dream' goals though, like finding a way to set up remedial glass blowing equipment with a willing village in Africa and setting up a fair trade business to help them prosper - or something like that. Anyway, it was nice to know I had a range of goals that could last me two lifetimes.

Step Three: Find An Organization System That Works For You!

How are you going to layout all your goals - or at least the 'short term' goals. A file on your computer? A white board? Pictures? A piece of paper? Flash cards? A calendar? Pick something, and if it doesn't work for you, try something new, and don't stop until you've found what works!

The trial version of my flash cards.


What I Found

At the beginning of the school year I was organizing myself by writing out everything I had to do in a list on lined paper. This resulted in a lot of rewrites, and it was a bit confusing since I couldn't reorganize by date completion, nor could I adjust dates without crossing out the old ones (I'm not a big fan of pencils). I wish I could carry a white board with me everywhere, but I can't, so my solution was to write everything I had to do out on card stock, then cut it up and arrange the topics in order of priority. By doing this I've allowed myself to rearrange and add in topics at any time, without hassle. I also always have a list on hand telling me what I can do next, and I can enjoy a wonderful feeling of satisfaction whenever I get to rip a completed 'to-do' out from the pile!

Go forth and enjoy list making and brainstorming!