Monday, October 8

What Is Kiln Casting?

Also known as, "I don't get it, what the hell is kiln casting?"

This is by no means an in depth tutorial, but it hopefully allows people to better understand the process at a glance.

Step 1: Create a mold out of clay or wax.
Some tiny bowl molds. The bottom halves are 'reservoirs' that will hold the glass. Since they are attached to the table they will also be the only area the plaster doesn't touch (and therefore the opening).

Step 2: Pour a mixture of plaster and silica over your clay/wax positive.
(This just looks like a big white cylinder, hence the lack of images to draw from.)

Step 3: Remove the clay/wax from the now solid plaster mold, replace with glass shards.

The mold has been flipped over. Chunks of crystal are sitting inside the reservoirs.

Step 4: Melt it.
After a full melt. I think the mold process is a lot easier to understand after seeing the broken away plaster and the upside down bowl. 

Step 5: Remove the plaster. Choose to freak out in horror or joy at the result. Preceed to spend one to ten hours coldworking / polishing it.
The final product, six tiny bowls that are stacked on top of each other!

And there you have it, some images to cover the basics of kiln casting! If anyone is having trouble grasping the concept still, please let me know! This seems very straight forward to me because I do it, but if it confuses other people than it's a very bad tutorial!

Friday, October 5

Jessie's Sculpting Walkthrough

These are the basic processes/steps I go through everytime I make one of my sculptures. I don't have pictures of everything so I am improvising with explanation or borrowing other pictures. (I can assure you I did not go from a dinosaur to a wolf!)

The Idea

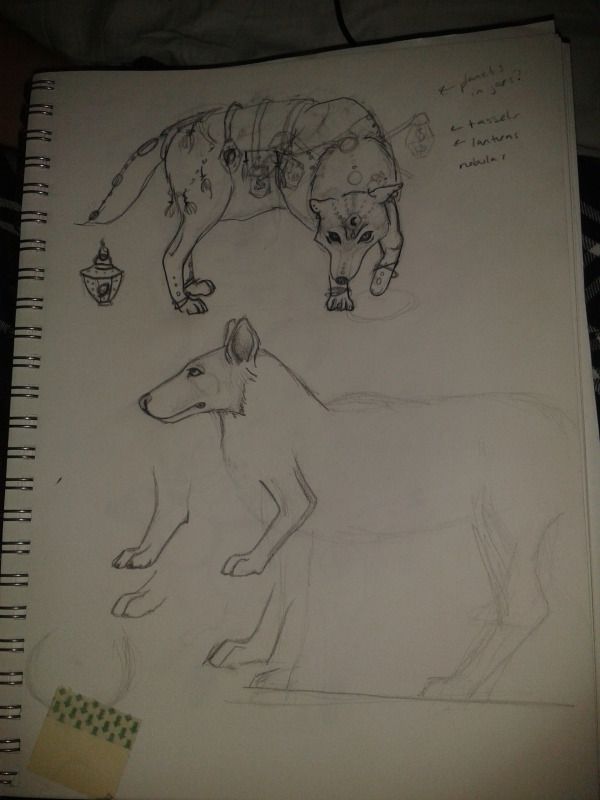
The first thing I can do before sculpting is coming up with an idea (this goes without saying). But okay what do you do after you have the idea? Well I sketch it out. For anything other than a human I sketch out a side profile (for the main shape) and a front profile (for the legs/arms); if it is a human, front profile is sufficient. I will generally draw the sculpture to scale and use it to measure and cut the wire for the armature.

Top wolf was my initial pose and plan.
Second wolf was my sketch for for the armature.
The little drawings of paws was me trying to figure how
to draw/sculpt the paws.

The Armature

Armatures are the skeleton of your sculpture. You want your armature to be sturdy and balanced (especially if it will be a free-standing sculpture). Just because you armature is balanced and will stand now doesn't mean it will still be balanced once you start putting on the clay.

Some things to consider are:

  • Where is the maximum bulk of your clay going to be? (for my Wolf, it was going to be the mane/neck)
  • Will this extra weight make my sculpture unbalanced? (Yes)
  • Where will you offset the weight? (I bulk out the mane with tinfoil so I will use less clay and I will add more clay to the tail to help even the weight)
If I had chose just a normal standing pose (with no bending to the inside) I wouldn't have had that big of a problem with the mane being heavier. But since I chose this pose, once I started putting the clay on, the outside caused him to topple over. I had to keep re-bending the armature and adding clay to other points until he was balanced.

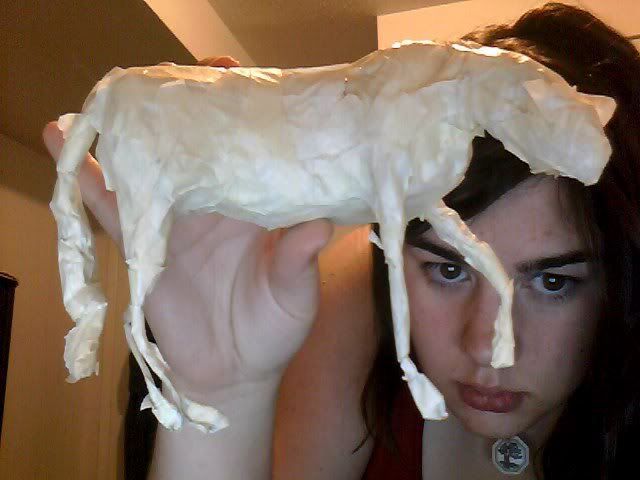
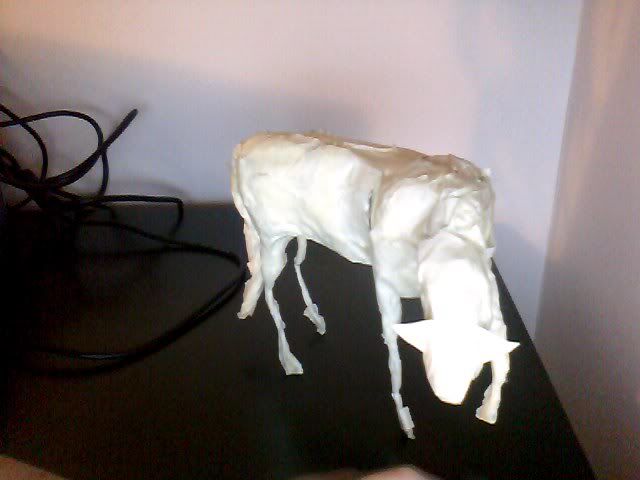
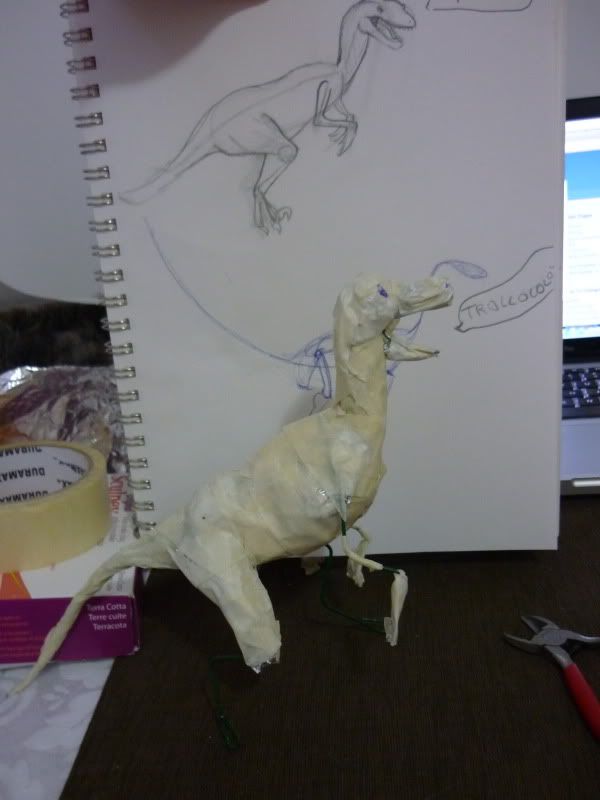
I didn't have any pictures (at least on this computer) of the wolf's wireframe before I finished bulking him out with tinfoil ... so here is Velcro the Velociraptor in partial wireform. 


You can see the floral wire still and bits of tin foil. After you bend your armature into the shape you are happy with, secure any joins with masking tape or even plumbers tape might work. Next you will want to use tinfoil to bulk out the areas that will take the most clay. I generally scrunch up the tinfoil and try to follow the muscle groups with it. I generally leave the legs and paws just wire and masking tape.

When you are happy with your amount of bulkiness, then wrap the fellow in masking tape to keep the tinfoil from moving and to provide you with a smooth solid surface to start adding clay.


These are two sculpture ready armatures!
Warning: Do not overbulk your sculptures with tinfoil. I have a tendency to do this sometimes and end up having to try and cut off some of the tinfoil (which is annoying and hard to do) or smooshing it. Basically you want your bulked armature to look like a emaciated version of whatever you are making. You have to account for the clay you are adding on and the thickness it will provide. As you can see I over-bulked my wolf! And I had a heck of a time to make him not look just plain chubby.

The Clay

When I start out, I try to apply an even amount of clay to the whole body. This allows me to see where I can afford to put more clay without creating a puffball. Next I start adding rolls of clay where the different muscle groups are - I was taught this in school and I find it makes the difference. 

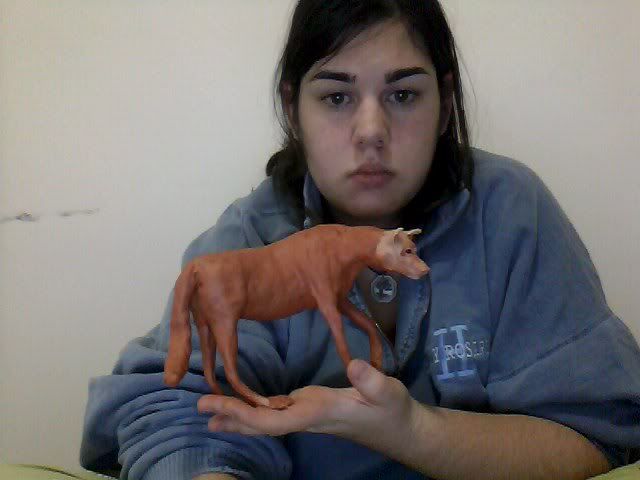
I used Sculpey Original (his body) and Super Sculpey (his head)


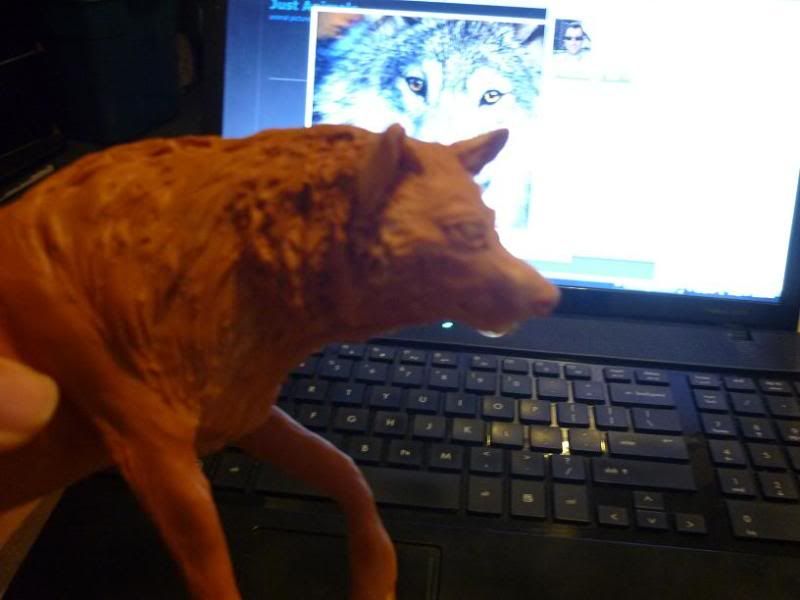
Once you are happy with the overall shape of your creature, its time to start refining the features. This is the stage where I sculpted the paws, mouth, nose, eyes and ears. I added clay for fur and textured what was already there of his mane and tail.


Alright I usually leave the sculpture for a few days and won't even look at it - then I come back with a fresh set of eyes and fix anything I am not happy with. This wolf's eyes were giving me trouble, but I thought I was happy with them and decided to bake him anyways.

The Bake


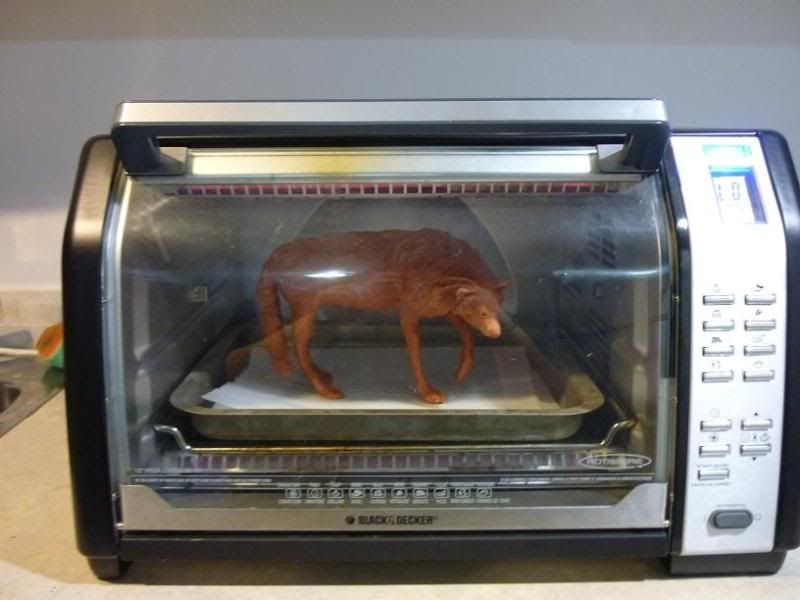
Not much to say here other than follow the manufacturers instructions on how to cook your sculpture. And keep a watchful eye on it if it is close to the element like this guy is. I burnt his back a bit, but it looks okay when I was painting him. I have never really experienced an issue by burning a sculpture, except for when trying to paint a lighter colour. 

The Paint

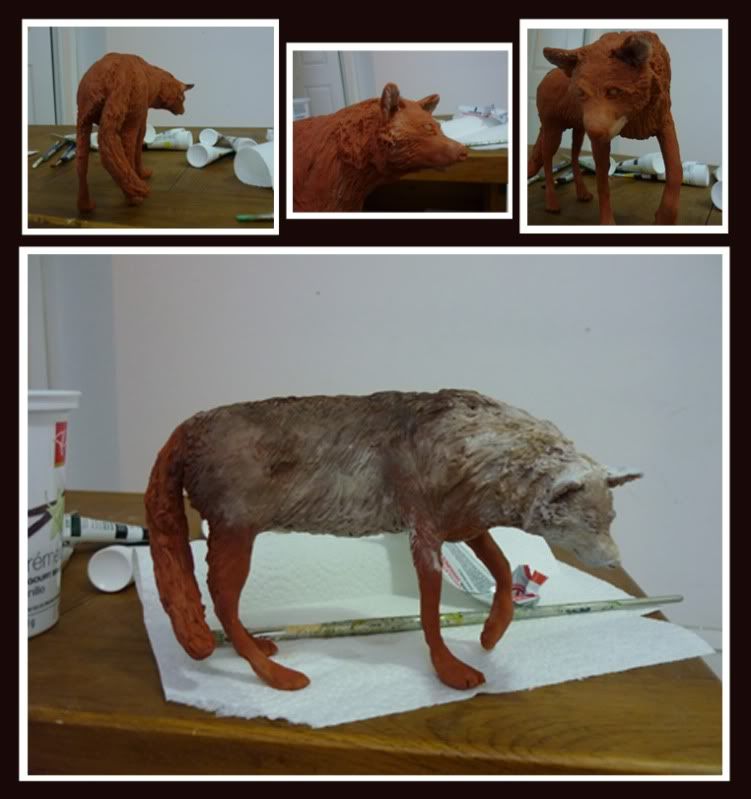
He is now baked and ready to be painted. I tend to dry-brush paint my sculptures, I generally like the look it gives them. Everyone is different when it comes to painting. I generally have 3 techniques: airbrushing, dry brushing, and pastel painting. 


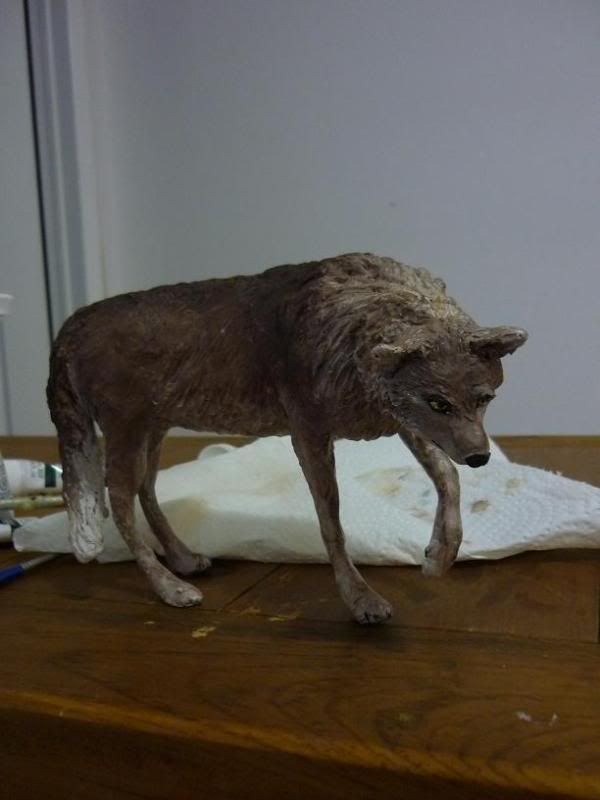
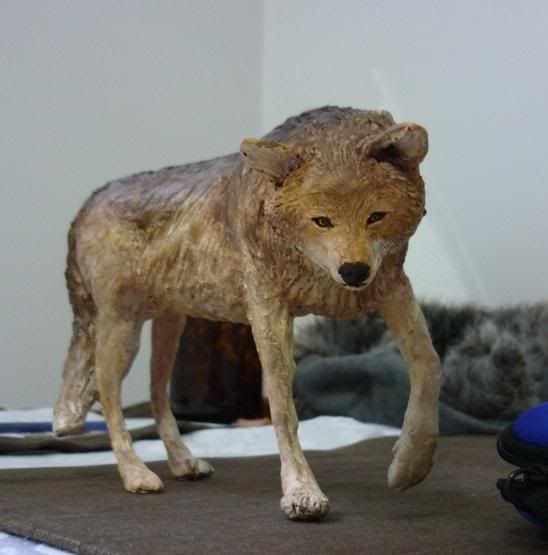
I was finished and I hated him. The nice colouring I had got too dark and it turns out I was not happy with his eyes and nose afterall. I wanted him to have a gentle look, not have the face of a cartoon villain. So as much as I hated to do it.  I find at this point you have 2 options... write it off and deem it done or fix it. I chose to fix it, so I started to re-add clay to his face in hopes of fixing the eyes and nose. This would have been a lot easier before he was baked lol. 

The Finished Product

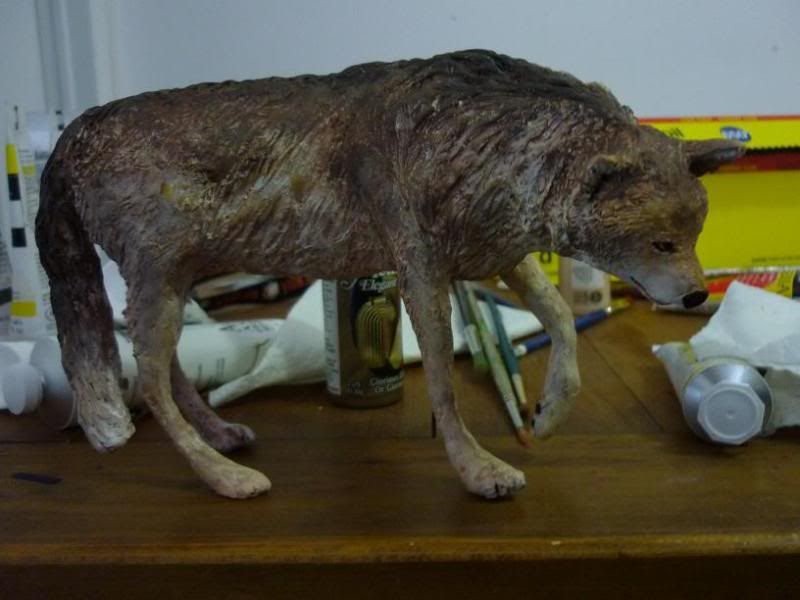
I was grumpy about having to fix my wolf, but I was a lot happier with the outcome and I am glad I did it. I actually repainted his whole body. I painted him bright yellow, red and orange before starting with the neutrals. The clay made a nice warm colour that showed through the paint and I wanted to mimic it again.


Wednesday, October 3

Battle 04 Winner!

Total Votes: 5
Nikki (Penguin)
  2 (40%)
Jessie (Polar Bear)
  3 (60%)


It looks like this week's winner is none other than Jessie and her stupidly adorable bear! I really can't wait to see what he looks like after some more painting, and I really wish I had concepts as neat as this bear -shakes fist-.
He's too darn cute, damnit!

On a happy side note, Jessie and I both noticed that the last post - Organizing Your Goals (3 Starting Steps) - has received 10 Facebook likes all on it's own! We're just overjoyed, seriously!

Monday, October 1

Organizing Your Goals (3 Starting Steps)

As this is my third and final year in school, a lot of the year seems to be focused on identifying goals and then figuring out a good path to them. This is very easy for some people, but very difficult for others, and of course, there's no one reason why it's like that. Some folks already have a set idea of a series of pieces or exploration in their mind so they know what their goal is, while others (like me) have a lot of ideas and don't know where to start, and I'm sure a few others don't have any solid ideas at all.

I've decided that earnestly contemplating your goals is very important, so I'm going to go ahead and share some ideas/pointers with anyone who's willing to listen!

Step One: Spend A Solid Hour Thinking And Writing About Your Goals

If you have isolated stretches of time in your day, like sitting on a bus for an hour, I suggest taking advantage of that time. Otherwise, I hope you're disciplined enough to stay away from your phone, computer and ipad.

What I Found

While making my dot jot list of ideas I found myself thoroughly thinking through all my possible goals, because why not? I had the time. I let them range from simple goals, up to absurd things that may never happen, and over to ideas that I would never have paid enough attention if I didn't write them down - the example for this one being that at different times of my art life I've always come back to the idea of (one day) putting over 100 hours of solid work into just one piece of art.

Step Two: Realize Your Goals Tend To Have 'Distinct' Time Lines And Adjust Accordingly

 Organize your goals into time frame categories that seem appropriate; short-term, long-term and, dream-term; one semester, two semesters, five semesters; this semester (four months), this year, five years, decades down the road if I can; student, emerging artist, experienced/established artist; etc. Please note that by no means am I suggesting you say, "I need to have all this done five years today, or else." That might be a little unrealistic.

Your goals may also have related themes, needs, etc, so don't forget to factor that in if you have to, or at least acknowledge the fact. In my list I found a big group of technical and skill related goals, a set of goals that related to owning or growing my own business, and a set that I perceived as being possible preferably (or most likely) after being some form of established professional.

A categorized list!

What I Found

Organizing some things, like making an oval glass frame and doing a 100+ hour piece of work actually weren't that hard. I'm not sure how to classify some 'dream' goals though, like finding a way to set up remedial glass blowing equipment with a willing village in Africa and setting up a fair trade business to help them prosper - or something like that. Anyway, it was nice to know I had a range of goals that could last me two lifetimes.

Step Three: Find An Organization System That Works For You!

How are you going to layout all your goals - or at least the 'short term' goals. A file on your computer? A white board? Pictures? A piece of paper? Flash cards? A calendar? Pick something, and if it doesn't work for you, try something new, and don't stop until you've found what works!

The trial version of my flash cards.


What I Found

At the beginning of the school year I was organizing myself by writing out everything I had to do in a list on lined paper. This resulted in a lot of rewrites, and it was a bit confusing since I couldn't reorganize by date completion, nor could I adjust dates without crossing out the old ones (I'm not a big fan of pencils). I wish I could carry a white board with me everywhere, but I can't, so my solution was to write everything I had to do out on card stock, then cut it up and arrange the topics in order of priority. By doing this I've allowed myself to rearrange and add in topics at any time, without hassle. I also always have a list on hand telling me what I can do next, and I can enjoy a wonderful feeling of satisfaction whenever I get to rip a completed 'to-do' out from the pile!

Go forth and enjoy list making and brainstorming!