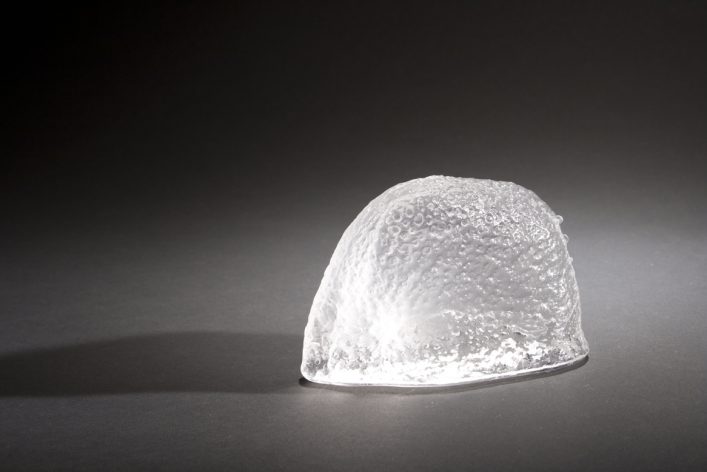
Of course there are many, many tutorials online for how to do this, but I just have to add my own.
I wanted to make my own screen because a 24" x 24" screen
is ridiculously large and impossible to use when you're working on a 1" x
1" scale.
You Will Need:
1 Picture Frame (with a flat surface ideally)
Screen Mesh or a Gauzy Curtain (I purchased screen mesh from Screentec in Mississauga, ON)
Staple Gun
A Helping Hand
Step One
Take your picture frame apart, being sure to take out any metal bits. If there are any broken splints of wood they'll tear the screen, so cover them with some electrical tape.
Step Two
Place the frame over your mesh and cut an at least one inch border around it.
Step Three
Like when you stretch canvas, you want to put a staple in the very middle of one of the picture frame sides. Then you flip the frame over, pull the screen taut, put a staple in the middle of that side, and continue on to the other two sides. As you repeat this process you staple out towards the edges, pulling as you go. This assures the screen will be as taut as possible.
Step Four
Trim the excess fabric if it's in the way, but don't cut too close to the staples, or it will end up fraying out.
When your silk screen is complete you can apply pictures to it in many different ways!
(If you need to expand this page, "Read More" is located under the Tweet button. Have to get that fixed.)
I happened upon some first years trying out sand casting, and decided it would be the perfect opportunity (much to their dismay) to finally document the sand casting process via photos. Our wonderful models today are Charlotte and Fazil.
I didn't get a photo of just the sand mold, but when you scroll down to the bottom you'll see it. Basically, to sand cast you could just dig a hole in sand, and pour glass into it. It can be that simple!
First you have to get all suited up. Charlotte has her casting jacket on (a lot of people wear them backwards), as well as a mesh face mask, jeans, running shoes (I burned a hole in my favorite boots two weeks ago from stepping on hot glass), and gloves that you can't see.
Here you can see the giant kevlar glove on Charlotte's hand that is protecting her from a very hot furnace that's full of molten glass. I'll assume it's around 2000°C, but to be honest I always forget which furnace is which temperature (there's a second cooler one in the background for blowing).
After gathering your ladle, you pour out your molten glass! You want to do it as fast as you can, but without tipping your ladle past the 90° point. The inside of the ladle is lined with glass that has already cooled off a lot, so if you tip too far, all that 'cold' glass will fall out and make a mess.
Here's the final product from a different angle. Since this was one of
her first pours the edges aren't that copacetic, but she'll get the hang
of it after a few more tries.
That's all you need to know to
understand the basics of sand casting! It can be an extremely technical
and intricate form of glass art though. There's adding color,
inclusions, different annealing programs, manipulating the hot glass,
and more. We also mix the sand and water with different substances to
cause different results, and we even mix different sand for different
results!
... Kind of like professional sand sculptors on the beach, the reason they're so detailed and amazing is because they truck in different types of sand, with different properties.
While this seems like an entirely simple concept, you'd be surprised how often it floats over people's heads. No, believe it or not, I am not going to tell you to dress professional if you feel you are attending a high-class event - I have heard this quite a few times already, and you know what? I really dislike this idea, and I have an actual reason why I do.
"But Nicole!" I can already hear people shouting out, especially my mother, "If you're meeting with a very upperclass client, you have to dress appropriately, that's just what you do, it's how it's done, you have to be 'professional'." Well, I'm sorry to say that while some of your potential peers or clients might believe that's true, I don't. I aruge that what is more important is a 'professional' (i.e. Confident) attitude.
Let me explain. You could be in the prettiest, most expensive clothes in the world - maybe they were even hand crafted by a famous textile artist that you happen to have an in with - but if you aren't feeling the clothes, if it feels wrong because you're only in them due to people's expectations, then I doubt you're going to be giving off the right vibes. Agree?
Does this mean dress like a slob? Of course not. It means dress in what feels right to you. So if high-class, sophisticated clothing makes you feel professional and like you belong with the big hitters that you're mingling with, then go ahead and wear it! But if you're content in jeans and paint splattered shoes, then just be yourself and wear that. For god sakes you're an artist, quirky behavior has long been synonymous with our career. And before you protest, let me just point out that Dale Chihuly always, and I mean always, wears paint splattered shoes out wherever he goes. It has been said that it is even part of his image as an artist and that he splatters every pair of brand new shoes with paint, so that he will always have that 'fresh out of the studio' look. I don't know whether or not this is true, but clearly his career has been rather successful, and I think that's proof enough that a pair of rough shoes or quirky wear will not be the cement to end your career.
To anyone who knows me and reads this thinking, "This is a built up excuse on why she thinks she can justify wearing her cat ear headband, her hairstyle, her clothes - " just stop yourself right there, please. (I assume) We're all aritsts here, and what about the term artist is synonymous with the idea of being so judgmental about things that do not matter? The great artists break the rules, so why do I always see people trying to set nonfunctioning rules and put walls up?
I remember last year after a large commission for the new Sheridan campus, there was a black tie opening that the glass students were invited to. We happened to be passing through the area before hand on a field trip that day, I was in a skull t-shirt and paint stained jeans. When my teacher asked, I explained to him that I had not been planning on attending the event, and that I clearly lacked the proper eveningwear. He insisted that I should go, that I was an art student and people would understand. So after a failed search for a last minute dress at the mall, I went to the event in my ill suited clothing. I know that some fellow peers hold that against me, that they judge me for being 'unprofessional' at a classy event, but I am also 100% sure that I had a better evening than any other student there.
I stood out in a sea of well dressed alumni in black suits and fancy dresses and should have been the most awkward person there (I'm actually surprised they let me in at all), but instead of hanging on to my fellow classmates, I socialized with these 'highclass' strangers. I had wonderful conversations, they gave me pointers on business and life (relevant to their field of work), we taste tested the odd dishes together (like caramlized duck), and I think we even spoke of wines and desserts. So if you cannot tell, I am really thankful that my teacher insisted I attend the event, because I had forgotten how well I can socialize with strangers (I swear, I'm wonderful with strangers, just horrible with classmates and family), that evening he indirectly helped me regain a great stroke of confidence.
That is not to say, of course, that I would condemn myself to paint stained jeans. There are moments when I would like to wear fancy clothing and expensive outerwear, but these choices are based on my personal taste, not fear of anyone's judgment, nor fear for lack of confidence.
Also known as, "I don't get it, what the hell is kiln casting?"
This is by no means an in depth tutorial, but it hopefully allows people to better understand the process at a glance.
Step 1: Create a mold out of clay or wax.
Some tiny bowl molds. The bottom halves are 'reservoirs' that will hold the glass. Since they are attached to the table they will also be the only area the plaster doesn't touch (and therefore the opening).
Step 2: Pour a mixture of plaster and silica over your clay/wax positive.
(This just looks like a big white cylinder, hence the lack of images to draw from.)
Step 3: Remove the clay/wax from the now solid plaster mold, replace with glass shards.
The mold has been flipped over. Chunks of crystal are sitting inside the reservoirs.
Step 4: Melt it.
After a full melt. I think the mold process is a lot easier to understand after seeing the broken away plaster and the upside down bowl.
Step 5: Remove the plaster. Choose to freak out in horror or joy at the result. Preceed to spend one to ten hours coldworking / polishing it.
The final product, six tiny bowls that are stacked on top of each other!
And there you have it, some images to cover the basics of kiln casting! If anyone is having trouble grasping the concept still, please let me know! This seems very straight forward to me because I do it, but if it confuses other people than it's a very bad tutorial!
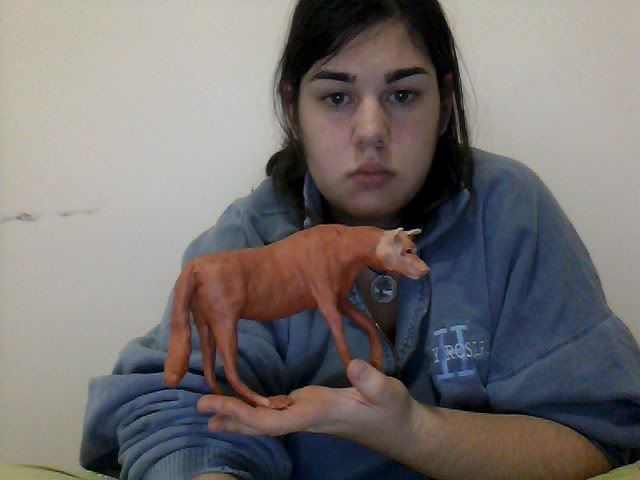
These are the basic processes/steps I go through everytime I make one of my sculptures. I don't have pictures of everything so I am improvising with explanation or borrowing other pictures. (I can assure you I did not go from a dinosaur to a wolf!)
The Idea
The first thing I can do before sculpting is coming up with an idea (this goes without saying). But okay what do you do after you have the idea? Well I sketch it out. For anything other than a human I sketch out a side profile (for the main shape) and a front profile (for the legs/arms); if it is a human, front profile is sufficient. I will generally draw the sculpture to scale and use it to measure and cut the wire for the armature.
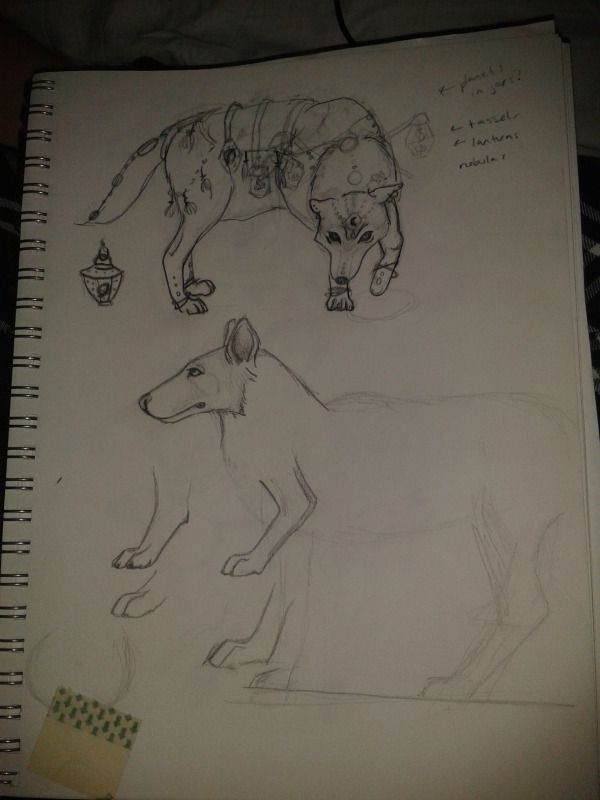
Top wolf was my initial pose and plan.
Second wolf was my sketch for for the armature.
The little drawings of paws was me trying to figure how
to draw/sculpt the paws.
The Armature
Armatures are the skeleton of your sculpture. You want your armature to be sturdy and balanced (especially if it will be a free-standing sculpture). Just because you armature is balanced and will stand now doesn't mean it will still be balanced once you start putting on the clay.
Some things to consider are:
Where is the maximum bulk of your clay going to be? (for my Wolf, it was going to be the mane/neck)
Will this extra weight make my sculpture unbalanced? (Yes)
Where will you offset the weight? (I bulk out the mane with tinfoil so I will use less clay and I will add more clay to the tail to help even the weight)
If I had chose just a normal standing pose (with no bending to the inside) I wouldn't have had that big of a problem with the mane being heavier. But since I chose this pose, once I started putting the clay on, the outside caused him to topple over. I had to keep re-bending the armature and adding clay to other points until he was balanced.
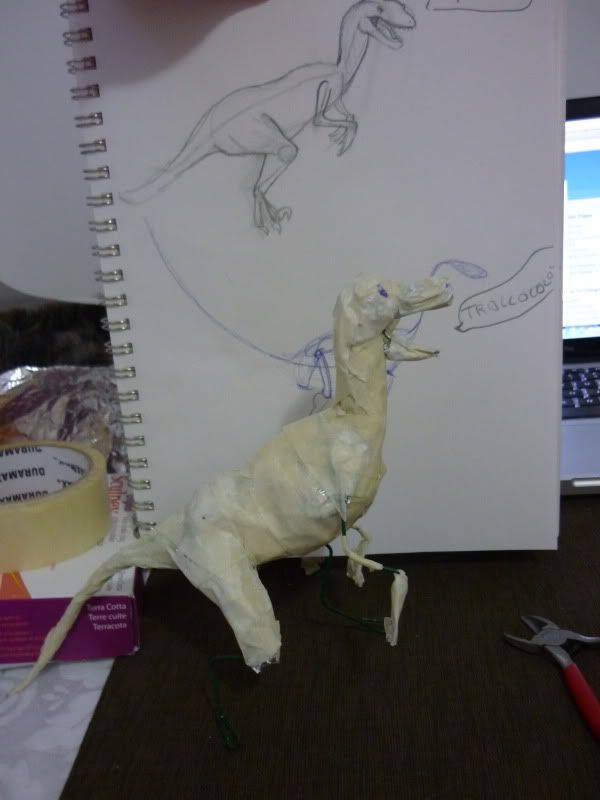
I didn't have any pictures (at least on this computer) of the wolf's wireframe before I finished bulking him out with tinfoil ... so here is Velcro the Velociraptor in partial wireform.
You can see the floral wire still and bits of tin foil. After you bend your armature into the shape you are happy with, secure any joins with masking tape or even plumbers tape might work. Next you will want to use tinfoil to bulk out the areas that will take the most clay. I generally scrunch up the tinfoil and try to follow the muscle groups with it. I generally leave the legs and paws just wire and masking tape.
When you are happy with your amount of bulkiness, then wrap the fellow in masking tape to keep the tinfoil from moving and to provide you with a smooth solid surface to start adding clay.
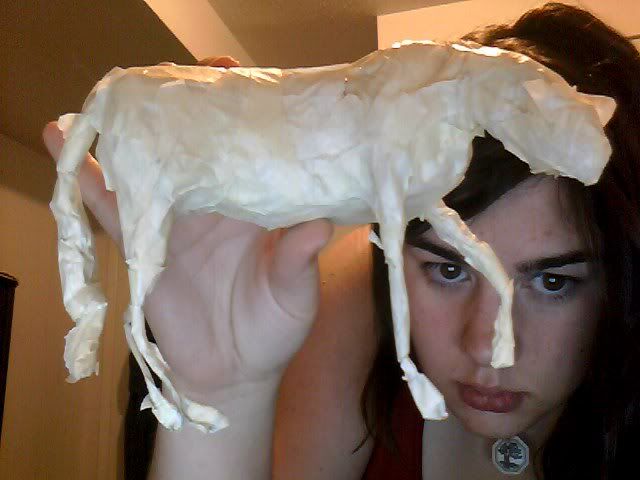
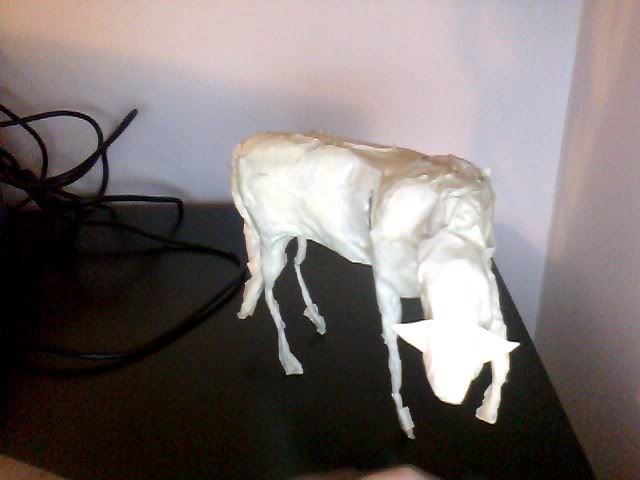
These are two sculpture ready armatures!
Warning: Do not overbulk your sculptures with tinfoil. I have a tendency to do this sometimes and end up having to try and cut off some of the tinfoil (which is annoying and hard to do) or smooshing it. Basically you want your bulked armature to look like a emaciated version of whatever you are making. You have to account for the clay you are adding on and the thickness it will provide. As you can see I over-bulked my wolf! And I had a heck of a time to make him not look just plain chubby.
The Clay
When I start out, I try to apply an even amount of clay to the whole body. This allows me to see where I can afford to put more clay without creating a puffball. Next I start adding rolls of clay where the different muscle groups are - I was taught this in school and I find it makes the difference.
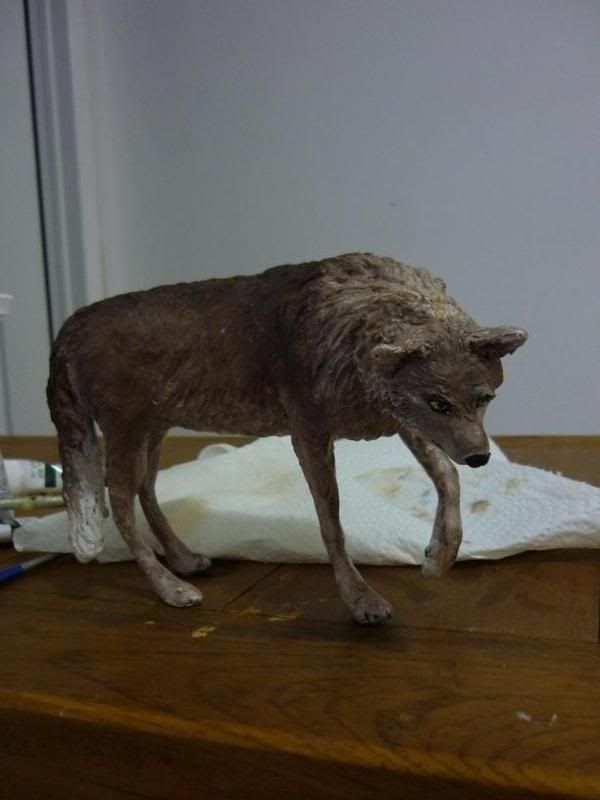
I used Sculpey Original (his body) and Super Sculpey (his head)
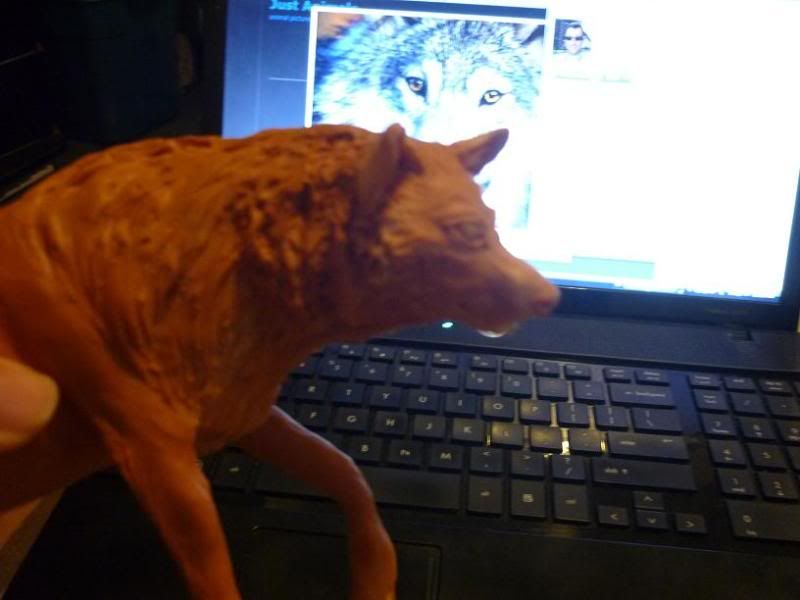
Once you are happy with the overall shape of your creature, its time to start refining the features. This is the stage where I sculpted the paws, mouth, nose, eyes and ears. I added clay for fur and textured what was already there of his mane and tail.
Alright I usually leave the sculpture for a few days and won't even look at it - then I come back with a fresh set of eyes and fix anything I am not happy with. This wolf's eyes were giving me trouble, but I thought I was happy with them and decided to bake him anyways.
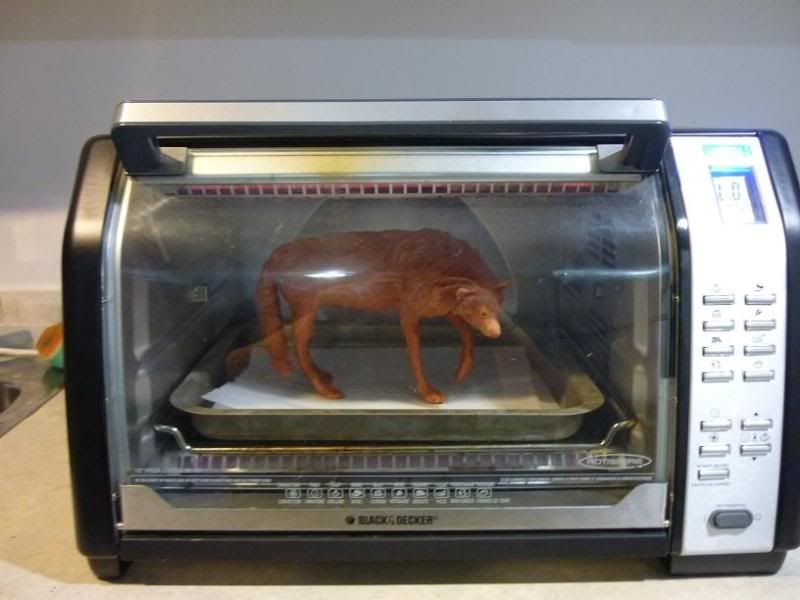
The Bake
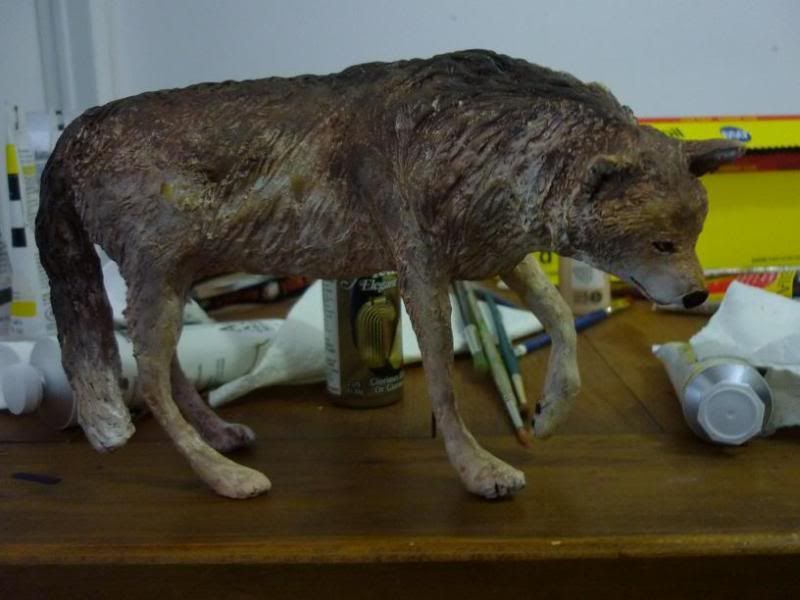
Not much to say here other than follow the manufacturers instructions on how to cook your sculpture. And keep a watchful eye on it if it is close to the element like this guy is. I burnt his back a bit, but it looks okay when I was painting him. I have never really experienced an issue by burning a sculpture, except for when trying to paint a lighter colour.
The Paint
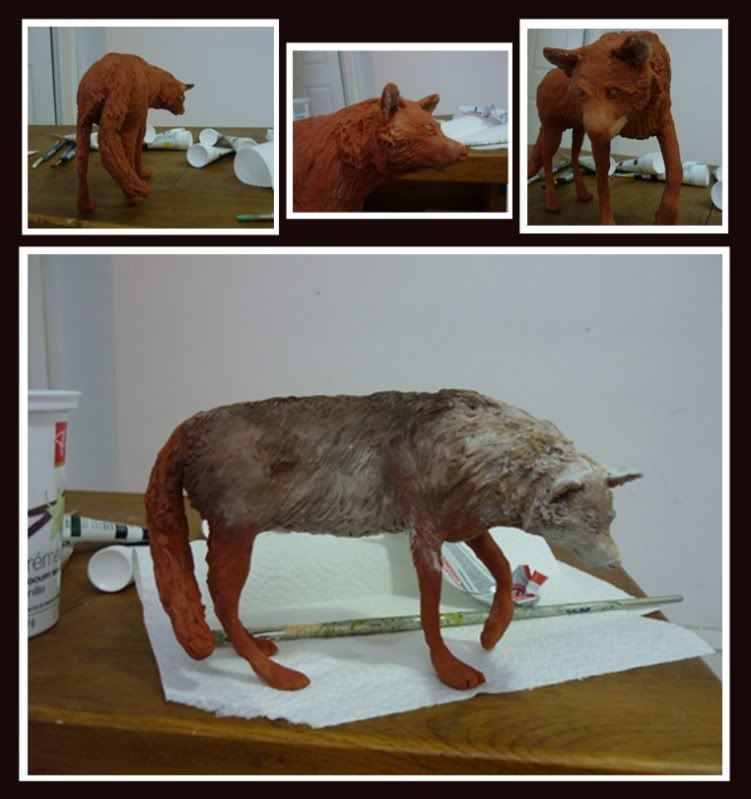
He is now baked and ready to be painted. I tend to dry-brush paint my sculptures, I generally like the look it gives them. Everyone is different when it comes to painting. I generally have 3 techniques: airbrushing, dry brushing, and pastel painting.
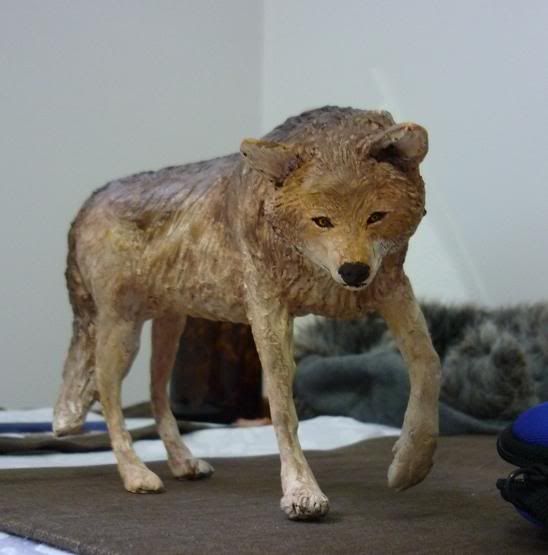
I was finished and I hated him. The nice colouring I had got too dark and it turns out I was not happy with his eyes and nose afterall. I wanted him to have a gentle look, not have the face of a cartoon villain. So as much as I hated to do it. I find at this point you have 2 options... write it off and deem it done or fix it. I chose to fix it, so I started to re-add clay to his face in hopes of fixing the eyes and nose. This would have been a lot easier before he was baked lol.
The Finished Product
I was grumpy about having to fix my wolf, but I was a lot happier with the outcome and I am glad I did it. I actually repainted his whole body. I painted him bright yellow, red and orange before starting with the neutrals. The clay made a nice warm colour that showed through the paint and I wanted to mimic it again.
As this is my third and final year in school, a lot of the year seems to be focused on identifying goals and then figuring out a good path to them. This is very easy for some people, but very difficult for others, and of course, there's no one reason why it's like that. Some folks already have a set idea of a series of pieces or exploration in their mind so they know what their goal is, while others (like me) have a lot of ideas and don't know where to start, and I'm sure a few others don't have any solid ideas at all.
I've decided that earnestly contemplating your goals is very important, so I'm going to go ahead and share some ideas/pointers with anyone who's willing to listen!
Step One: Spend A Solid Hour Thinking And Writing About Your Goals
If you have isolated stretches of time in your day, like sitting on a bus for an hour, I suggest taking advantage of that time. Otherwise, I hope you're disciplined enough to stay away from your phone, computer and ipad.
What I Found
While making my dot jot list of ideas I found myself thoroughly thinking through all my possible goals, because why not? I had the time. I let them range from simple goals, up to absurd things that may never happen, and over to ideas that I would never have paid enough attention if I didn't write them down - the example for this one being that at different times of my art life I've always come back to the idea of (one day) putting over 100 hours of solid work into just one piece of art.
Step Two: Realize Your Goals Tend To Have 'Distinct' Time Lines And Adjust Accordingly
Organize your goals into time frame categories that seem appropriate; short-term, long-term and, dream-term; one semester, two semesters, five semesters; this semester (four months), this year, five years, decades down the road if I can; student, emerging artist, experienced/established artist; etc. Please note that by no means am I suggesting you say, "I need to have all this done five years today, or else." That might be a little unrealistic.
Your goals may also have related themes, needs, etc, so don't forget to factor that in if you have to, or at least acknowledge the fact. In my list I found a big group of technical and skill related goals, a set of goals that related to owning or growing my own business, and a set that I perceived as being possible preferably (or most likely) after being some form of established professional.
A categorized list!
What I Found Organizing some things, like making an oval glass frame and doing a 100+ hour piece of work actually weren't that hard. I'm not sure how to classify some 'dream' goals though, like finding a way to set up remedial glass blowing equipment with a willing village in Africa and setting up a fair trade business to help them prosper - or something like that. Anyway, it was nice to know I had a range of goals that could last me two lifetimes.
Step Three: Find An Organization System That Works For You!
How are you going to layout all your goals - or at least the 'short term' goals. A file on your computer? A white board? Pictures? A piece of paper? Flash cards? A calendar? Pick something, and if it doesn't work for you, try something new, and don't stop until you've found what works!
The trial version of my flash cards.
What I Found
At the beginning of the school year I was organizing myself by writing out everything I had to do in a list on lined paper. This resulted in a lot of rewrites, and it was a bit confusing since I couldn't reorganize by date completion, nor could I adjust dates without crossing out the old ones (I'm not a big fan of pencils). I wish I could carry a white board with me everywhere, but I can't, so my solution was to write everything I had to do out on card stock, then cut it up and arrange the topics in order of priority. By doing this I've allowed myself to rearrange and add in topics at any time, without hassle. I also always have a list on hand telling me what I can do next, and I can enjoy a wonderful feeling of satisfaction whenever I get to rip a completed 'to-do' out from the pile!
I decided to do a bit more of a personal post for today and I am going to give you guys the recipe for my inspiration! Everyone has trouble finding their muse sometimes, so I am going to share what I generally do when feeling slightly lost for inspiration. (Or if I just want to do a creative exercise!)
Preparation:
- Bang head against the desk!
- Sharpened pencils + pens (or whatever you like to write/draw with)
- Blank paper
- Imagination
Directions: Step 1: Look around your current environment for things that look interesting or that can be altered in some way. Do some doodles and see if any motivation evolves from this. For example, right now I see a sleeping kitty, a large container of pretzels and a Buddha statue.
- I could sculpt a sleeping kitty
- I could create some sort of Buddha shaking hands with a Lucky Cat
- That container of pretzels could become an interesting jar full of fairies or insects
Step 2: Go for a walk! Sometimes nature provides us with the most interesting subjects. I generally try to look for things (whether human made or organic) and find a way to change them. A tree with interesting knots could be an old father tree with a kind face. Or an awesome older Victorian house might be transformed into a haunted house with gargoyles! A tire swing could be the moon caught on a string from a tree.
Step 3: If you still have no inspiration then it is time to hit the resources. Whenever I am somewhere that sells books, I search through random resource books. I love horses, fairytales, fantasy and the medieval era so I have fairytale books, horse reference guides, books with pictures and descriptions on mystical creatures, Greek mythology stories, guides on swords and armor, etc. Again sometimes you have to force the creative processes, so if nothing interests me I will choose a story or a book and either try to recreate a scene from the story with my own flare or find an image I like and again try to modify it in some way. For example, what would Little Red Riding Hoods armor look like, if she were to have it?
Step 4: Look at other peoples work or techniques and try to mimic it. I find trying new techniques often makes my mind fill up with oodles of ideas on my own ideas that I could try. For example when I learnt about resin I initially wanted to try what I had seen, but then I thought of all the possibilities I could do.
Step 5: Internet Timez. Sometimes I exhaust all the previous steps so I need to find something completely new. For that I use random sites like StumbleUpon, Etsy or Pinterest to show me things I hadn't particularly thought of. Or I will just Google random words and see what comes up.
Step 6: Inspiration or motivation are sometimes found in friendly competition; which is actually how this blog came to live! There are a multitude of blogs, forums or even community groups that hold contests of all sorts in the arts. Our blog holds a random themed contest every few weeks which allows us to get really creative and step out of our comfort-zones! There's a contest on Craftster.org that we will most likely be participating in where you go to a thrift store and buy an ugly item. Then somehow using your craft, you need to turn it into something amazing and beautiful! The catch is, you can only spend 20$ US on your ugly thrift item. :) I don't know about you but that really gets my creative juices flowing!
So that concludes my creative process. Generally by the end I have a lot of concept drawings and ideas that I want to try. I like to keep these drawings and use them later as references or inspiration. Hope you enjoyed this post! And sorry about the lack of pictures :P
Unconscious art is a little bit hard to explain, especially in writing, but it's a pretty cool idea and I absolutely adore it!
At a glance, as the name suggests, the idea is to make art without thinking about it. "Well," you're probably thinking right now, "That's downright impossible unless it comes to me in a dream!" But trust me, it is possible, and to keep it simple I'm just going to offer some quick points for you to link together and digest on your own.
-> When making unconscious art you cannot have a 'final' idea on what your piece is going to look like.
-> It's okay to choose one shape or tool movement and just repetitively go with it - who knows how it will turn out!
I created the above piece by throwing around
clay, then shoving a serrated tool into every crease I saw, and simply
wiggling the tool around to turn the area into a little crevice. At
first glance I thought it was hideous but now I love it because I don't see anything else like it.
On the piece below, after throwing around the clay (until I was content to
move on), I took the end of a tool and just poked as many holes as I possibly could. When I made these two pieces I was just trying to pass
some time after a rough life problem; the inability to focus on
my art meant I could just go with a new flow, and develop a unique form.
-> Puking your colors onto your canvas actually counts as unconscious art.
->
Why is puking a horribly great example? Because short of aiming your
head in one direction or another, you have no control over the way the
final piece will look.
-> For the artist who cares about their
teeth, this is how my school mate Chris says he did the following pieces:
To create these images Chris tried his hardest not to look at or think about what he was doing as he randomly did auto-writing in wax, followed by water, black ink and
red ink. He went on to explain, "I did this on a bed of newspaper and paper towel and
once I got all the ink on, I picked it up and let the excess drain
off first toward the bottom, then toward the top and then left
side, and right side if it was still moving.
Total work time
like 45 seconds, and then quite sometime to dry. It's not
terrifically important, but it is part of the rules I set-up for
myself! I suggest fixer after it's dry so you don't get that
serendipitous smearing during mounting." *If anyone's interested in his amazing Rorschachs, he's got an Etsy.
->
You cannot create this type of art using a process such as glass
blowing, because there are too many variables that you have to take care
of (i.e. the heat, pipe rotation, glass thickness).
That last point is kind of a doozy right? If you're a textile artist, then you can't very well sew an 'unconscious' wallet, can you? But I think that's where it becomes really fun, because you have to look outside the box!
Textiles:
My suggestions to Ducky have been along the lines of, "Throw some pieces of fabric around without looking, then sew them together as they are." Yes this does sound like a big mess, because what could you make it into? A malformed doll or ball?
Her idea was to use an unconscious process (inspired by Chris') to create print and dye patterns on her fabric. From there, she can take that unique fabric and make whatever she'd like with it!
Super Sculpey:
Jessie's solution to the dilemma of building an armature (which you can't do unconsciously) is to doodle onto a piece of paper, and then take that drawing and translate it into 3D. As a bonus she still isn't going to have a clue what the final piece will look like since she needs to create the other sides of it, so there's two elements of surprise in her work!
All in all, unconscious art can be a little bit complicated, it's hard to tell when you're thinking without meaning to, and some people just can't grasp this concept at all. But it's definitely worth it, even if you're just taking an unconscious design and then using it to build something new up - because I guarantee it will stand out from your other work.
Finally, if you have any neat ideas for other unconscious processes, go ahead and let us know! I'm absolutely enthralled with the idea of running at a medium from a new and mysterious starting point!
And remember, you can comment without signing in!
[Edit: I tweaked Chris' quote after he commented and suggested we elaborate on the random/unconscious nature of his process.]
Silicone molds are extremely useful, especially if you want to mass produce something, or be lazy. I use it to create wax positivies, which are then made into glass, but I've seen other people use it for resin, soap and sugar decals for cakes. On my blog Glassables there is a silicone demo post that has more photos and is run a little smoother since I wasn't participating, but I wanted to make one based off my own trial and error adventures with my friends. After all, I think there's a skill in being able to work messily and quickly, while taking photos at the same time.
Materials Needed:
-dish/hand soap
-silicone type 1 (stinky gross stuff!)
-a bucket of water
-a permanent marker
-a plastic surface to work on
-a bit of clay or wax
-ventilation (the overwhelming vinegar odour is not appealing)
-the object you'd like a master mold of*
*Brass will be ruined
I wanted to make a mold of an ostrich egg, so I could use it as a blank for making large dragon eggs. My friend Tabbie pumped the silicone for us, while our other friend Mandi kneaded the silicone together and then passed it off to me so I could wrestle with it on my egg. It took two tubes of silicone to cover this beast.
Step 1: Use the wax/clay to attach your object to your plastic.
Step 2: 1" away from your piece, draw a line with a permanent marker.
Step 3: Soap up your object, your water, your hands and ALL up your arms (or the silicone will stick to you!).
Step 4: Grab your Type 1 Silicone, and poke a hole through the seal inside (we forgot and it broke out the back).
Step 5: Squirt silicone into water - make sure the silicone hits the water BEFORE it hits your hands.
Step 6: Knead it together into a ball, then quickly pass it on/apply it to the object.
Step 7: Apply to object.
It will try to slip down the object, so keep pushing it upwards and fighting with it!
Try to make it 1" thick all around, if it's too thick it will be less flexible and harder to work with ):
At this point I couldn't keep picking up the camera, sorry!
Step 8: When you give up wrestling, press a sheet of glass onto the top of the mold
to make a flat spot that it can sit on. Let your silicone set!
Step 9: Take out/Cut your object free within 24 hours. Cut zig-zag lines, not straight ones.
Use T Pins to keep the cuts together when you're casting into it.
Notice the lack of natural opening on that mold? I didn't use enough wax (never be afraid to have too big of a hole), so either my rough handling or the weight of the silicone caused the egg to tip off center. That or the wax just didn't stick to my plastic well. I think having the mold come loose has affected the way the mold will look, but we won't know until I get some T Pins so I can use it.
You
can see the tiny tangerine mold above, and I think it's worth
mentioning! You see, we accidentally opened a third tube of silicone so
we HAD to do something with it.
So I went, "Quick! Someone check to see if there's a tangerine
upstairs!"
Then I had Mandi fly solo on soaping/attaching/molding the tangerine. Her wax, of course, also came undone, so she was flying blind with and everything was going wrong that could. And you know what? That made the experience much more worth it. There's nothing better than having no idea what you're doing (especially when the outcome doesn't matter).
Miss Mandi told me earlier in the day that she was curious about resin and polymer clay because she had a) started making jewelery and b) wanted to get more into art. Assuming that one day she'll have a reason to make a mold, I think having this terrifying experience under her belt will come in handy.